Sandbox Mode
How To Install A Skyseal Laminated Glass Roof Lantern on a Builder's Upstand
Step by Step Installation Guide
-
Assemble Base Frame

Ensure the corner cleat countersink is facing upwards when inserting them into the kerb bars.
Connect one corner first then move onto one of the opposite edges before connecting the last edge with the last 4 corner cleats attached to it.
-
Apply Sealant

Apply the sealant into the corners (ensuring that the sealant covers the whole diagonal of the corner) and edges of the frame.
Flip the frame and position onto the upstand with the sealant now at the bottom of the frame, sealing the frame to the upstand.
-
Connect Spider Frame (6 Pane)

Slide the top part of the hip inner to expose the screw hole and connect it into the ridge inner.
Screw the hip bolt into the pre-drilled hole and slide the top part of the hip inner back over the screw.
Repeat for the other 3 hip inners.
-
Connect Spider Frame (4 Pane)

Slide the top part of the hip inner to expose the screw hole and connect it into the inner casting.
Screw the hip bolt into the pre-drilled hole and slide the top part of the hip inner back over the screw.
Repeat for the other 3 hip inners.
-
Fit Spider Frame to Base Frame

Ensure all bolts are aligned with casting holes.
Put both corner bolts in loosely before tightening.
-
Fix Unit to Upstand

Fix unit to the upstand through the pre-drill holes using the kerb screws.
Place the kerb screw caps onto the screws once done.
Note: Roof lantern is supplied with the maximum fixings required. Smaller sizes will have surplus of screws.
-
Prepare Glass Panes

Ensure glass is correct way round: Laminate labelled face to INTERNAL; and self-clean side to EXTERNAL. If necessary, remove labels at point of fitting.
Insert the glass stop on the bottom edges of the glass panes, ensuring the glass stops leave a 22mm gap from the edge of the glass pane.
-
Fit Glass to Frame

Fit the glass to the frame and align the corners. Ensure both clips are engaged with the kerb. Line up glass stop with drainage channel.
-
Position Glazing Clamps

Remove the 3M covering of the adhesive on the glazing clamps and place them on the joints of the frame.
-
Align and Clip on Hip Outers

Align the hip outers to the frame and gently press down to clip them on. If required, you can use a rubber mallet to gently align the hip outers to the frame.
If you have a 6 pane lantern, you will need to do the same for the rafter outers.
-
Align and Clip on Ridge Outer

If you have a 6 pane lantern, align the ridge outers to the frame and gently press down to clip them on. Then, fix down the glazing clamps using the clamp bolts.
If you have a 4 pane lantern, you just need to fix the glazing clamp down with a clamp bolt.
-
Clip on Ridge Caps

Align the ridge caps over the glazing clamps and gently press down until you hear a click.
-
Attach Hip Caps

Insert the hip caps into the corners of the frame and fix them on with the outer cap screws. Place the cover caps over.
-
Attach Rafter Caps (6 Pane ONLY)

Attach the rafter caps into the joints of the frame and fix them on with the outer cap screws. Place the cover caps over.
-
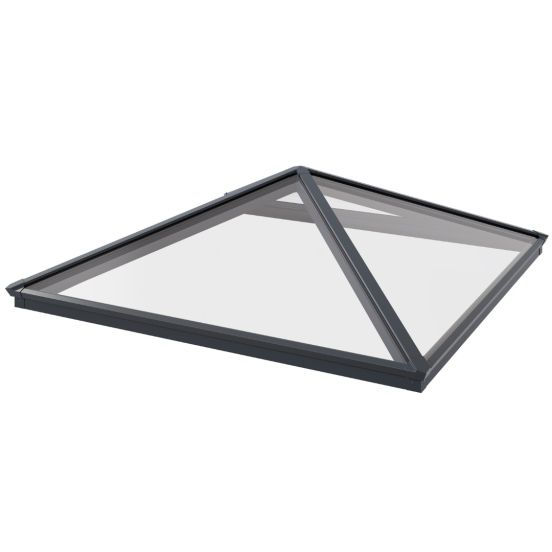
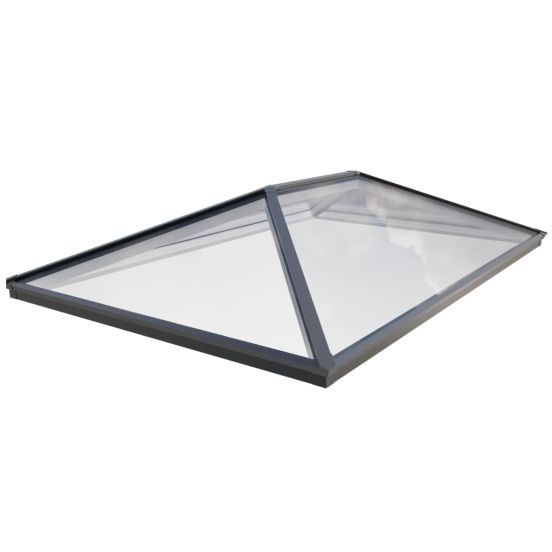
Completed Skyseal Lantern

The completed Skyseal Lantern comes with a 10 year warranty and has a laminated inner pane to protect those below.